Install XCP-ng
How to install XCP-ng.
ISO installation
If you want to use the netinstall ISO, see the Netinstall section.
Download and create media
You can download the latest installer for XCP-ng 8.3 LTS from here: https://mirrors.xcp-ng.org/isos/8.3/xcp-ng-8.3.0-20260806.iso?https=1.
SHA256 checksums, GPG signatures and net-install ISOs are available here.
Then, create the install media (e.g. a USB key 1GB or larger should work):
# example with XCP-ng 8.3
# dd if=xcp-ng-8.3.0-20260806.iso of=/dev/sdX bs=8M oflag=direct
Finally, boot on that media and go to the next section.
On Windows, you can use Rufus to create the bootable USB stick.
Start the host
Start the host and boot on the USB media.
Follow instructions
1. UEFI vs BIOS
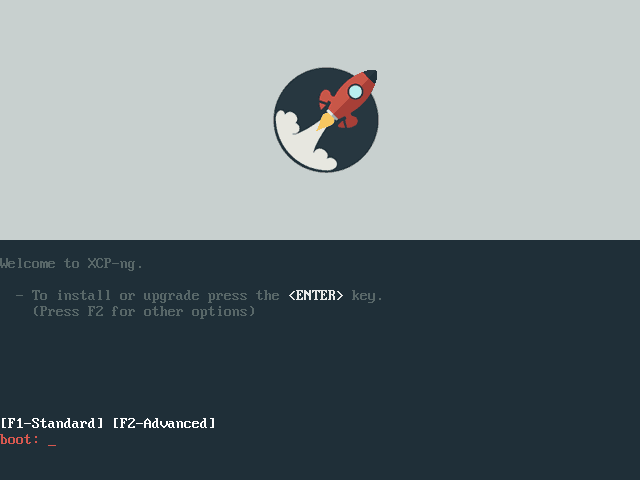
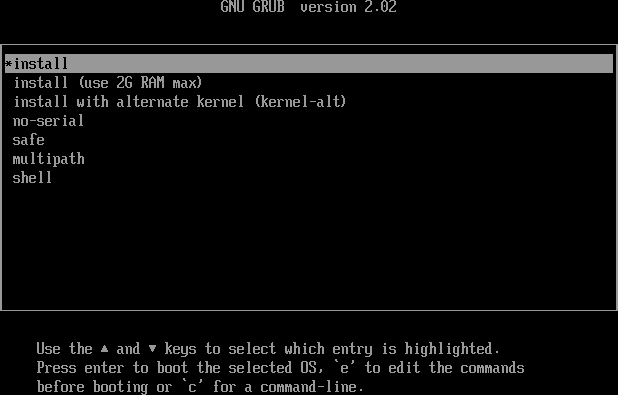
Boot screens are just slightly different on start between BIOS and UEFI mode:
BIOS splash screen:
UEFI splash screen:
NEVER switch from UEFI to BIOS (or vice-versa) after you installed XCP-ng. Stick to the mode that you chose during the install.
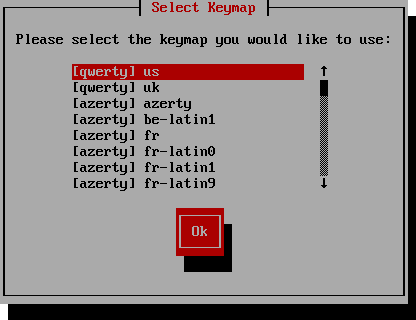
2. Language selection
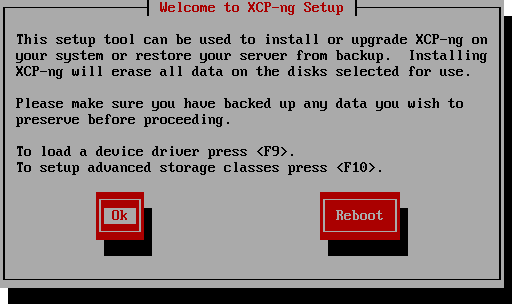
3. Welcome
4. EULA/license
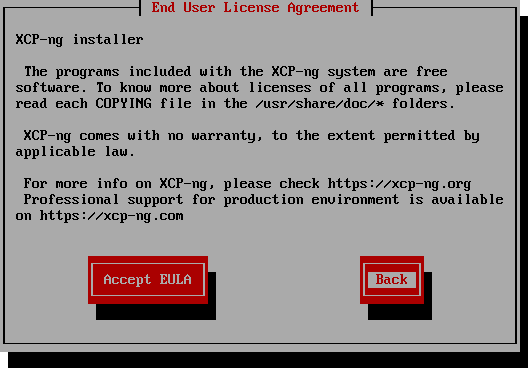
5. Disk selection
This is the screen where you'll select where XCP-ng will be installed. XCP-ng is a specialized Linux distribution, so you need to dedicate a physical disk to it. Partitioning is done automatically.
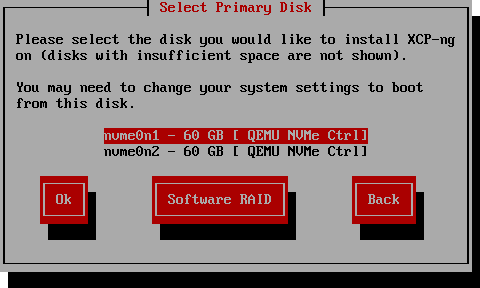
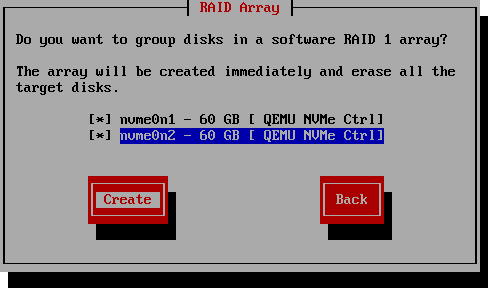
Alternatively, if you have two identical disks, you can use Software RAID (mdadm) :
6. VM storage selection
This is the place where your VM disks will be stored. It's called a Storage Repository (SR). It can use the same disk you installed the system on. It will automatically use the free space after system partitions.
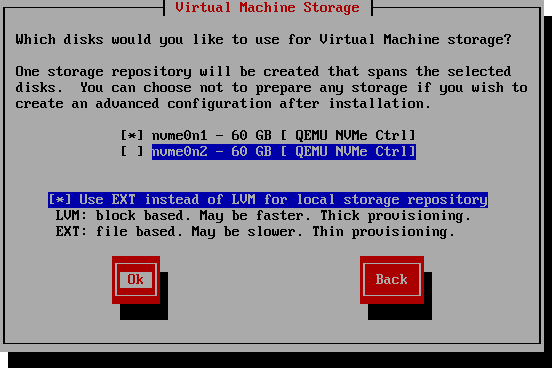
EXT instead of LVM? We advise to use EXT to benefit from thin provisioning!
Don't confuse this step with step 5: here you choose where VM disks are stored, not where the system is installed.
7. Installation source
If you use the default ISO, just select "Local media":
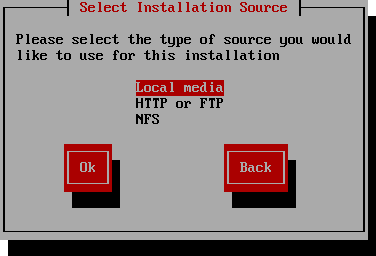
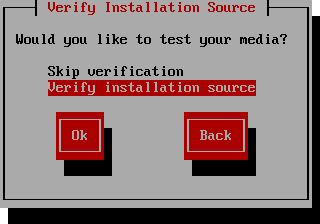
Then, you can verify your media or not:
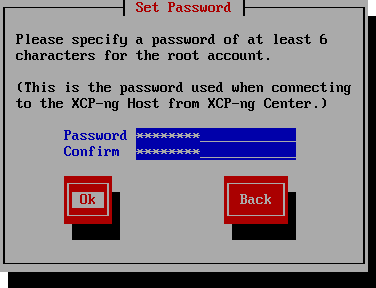
8. Host password
This will be the root password, used to connect to the host with SSH and XAPI.
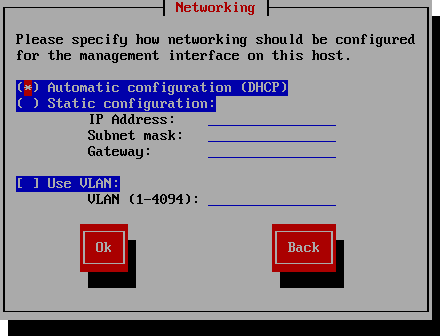
9. Networking
Here you can choose the IP mode (IPv4 only, IPv6 only, or IPv4+IPv6, still experimental), which can't be changed after installation, and select between DHCP and static network, even using a VLAN:
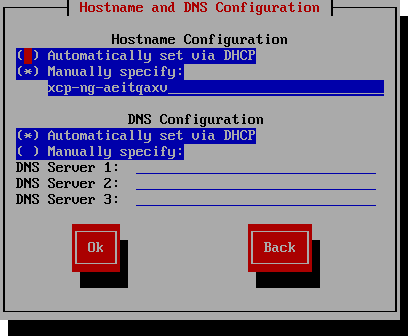
10. Hostname and DNS
Configure the hostname of your server and the DNS resolvers.
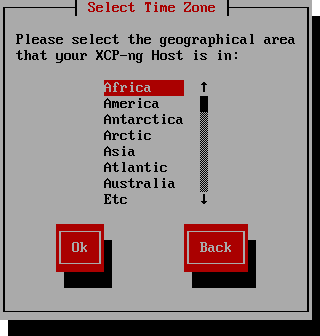
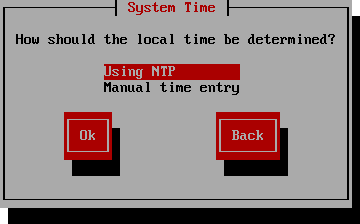
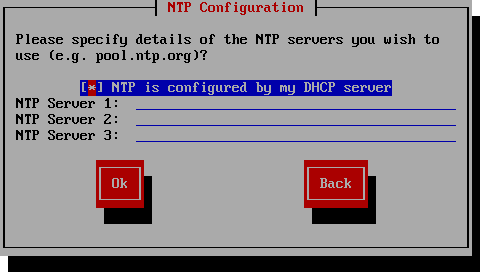
11. Timezone and time
ALWAYS use an NTP server. It's a critical component to manage your host(s). If you don't know any NTP server, you can use pool.ntp.org.
12. Installation
After this step, data will be written on the disk(s)! Check the listed device(s) one last time.
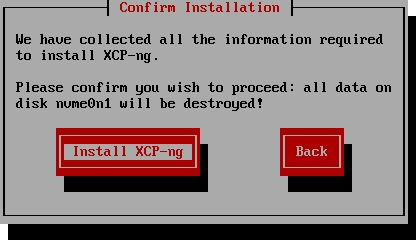
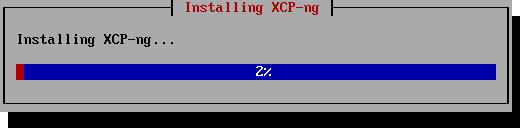
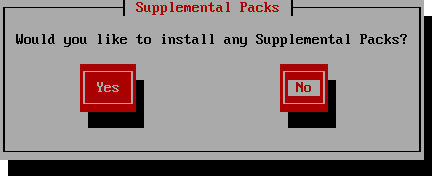
13. Supplemental packs and end of install
If you loaded a driver disk earlier in the installation, the installer asks whether you want to install supplemental packs. Otherwise this dialog isn't shown. Skip it unless you know you need it:
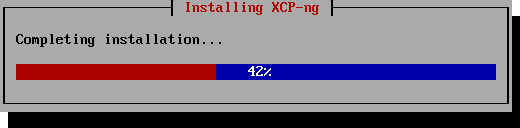
"Completing installation" is in fact installing the bootloader and building the initramfs. It can take time.
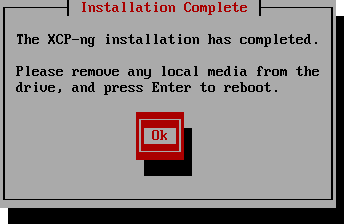
14. Reboot
After a reboot, you should see the GRUB menu:
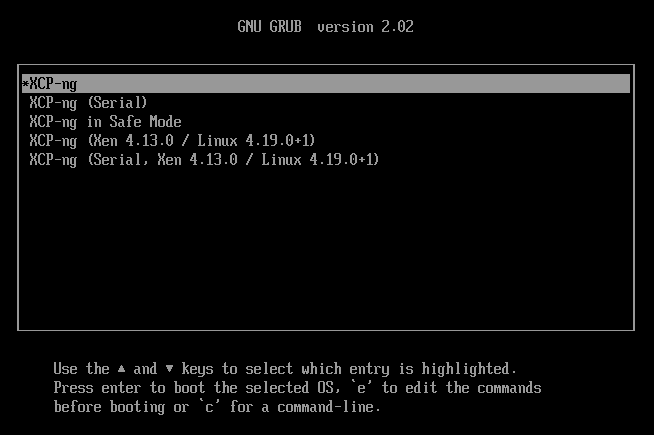
It means the system is correctly installed! Enjoy XCP-ng 🚀
Netinstall
The netinstall image is a lightweight ISO (around 150MiB) that will only contain the installer, but no actual RPM packages. Sometimes, it's more convenient/faster when your ISO is on a slow connection (e.g. a virtual media using a server IPMI).
You can download it on this URL: https://mirrors.xcp-ng.org/isos/8.3/xcp-ng-8.3.0-20260806-netinstall.iso?https=1.
As with the regular installation ISO, write it on a USB media:
# dd if=xcp-ng-8.3.0-20260806-netinstall.iso of=/dev/sdX bs=8M oflag=direct
Everything else is like the regular install, except that it will not offer to install from local media, only from distant ones.
PXE boot install
Requirements
To get XCP-ng installed from PXE, you need:
- DHCP and TFTP configured servers
- Any NFS, FTP or HTTP server (your choice) to host XCP-ng installation files
- A PXE-boot compatible network card on your host
PXE boot doesn't support tagged VLAN networks! Be sure to boot on an untagged network!
TFTP server configuration
TFTP server configuration - BIOS boot
- In your TFTP root directory (eg
/tftp), create a folder namedxcp-ng. - Copy the
mboot.c32andpxelinux.0files from the installation media to the TFTP root directory. - From the XCP-ng installation media, copy the files
install.img(from the root directory),vmlinuz, andxen.gz(from the /boot directory) to the newxcp-ngdirectory on the TFTP server. - In the TFTP root directory, create a folder called
pxelinux.cfg - In the pxelinux.cfg directory, create your configuration file called
default.
The file itself will contain the way to install XCP-ng: manually (with answer to provide on the host console/screen) or fully automated (see Automated install below).
Here is an example of a manual installation:
default xcp-ng
label xcp-ng
    kernel mboot.c32
    append xcp-ng/xen.gz dom0_max_vcpus=2 dom0_mem=2048M,max:2048M com1=115200,8n1 console=com1,vga --- xcp-ng/vmlinuz xencons=hvc console=hvc0 console=tty0 --- xcp-ng/install.img
What the TFTP folder looks like when configured
# tree -L 1 /srv/tftp/
srv/tftp
├── mboot.c32
├── pxelinux.0
├── pxelinux.cfg
│   └── default
└── xcp-ng
  ├── install.img
  ├── vmlinuz
  └── xen.gz
TFTP server configuration - UEFI boot
If you want to make an installation in UEFI mode, you need to have a slightly different TFTP server configuration:
- In your TFTP root folder, create a directory called
EFI/xcp-ng - Configure your DHCP server to provide
/EFI/xcp-ng/grubx64.efias the boot file - Create a
grub.cfgas follows:
 menuentry "XCP-ng Install (serial)" {
    multiboot2 /EFI/xcp-ng/xen.gz dom0_mem=2048M,max:2048M watchdog \
    dom0_max_vcpus=4 com1=115200,8n1 console=com1,vga
    module2 /EFI/xcp-ng/vmlinuz console=hvc0 console=tty0 install
    module2 /EFI/xcp-ng/install.img
 }
- Copy this
grub.cfgfile to theEFI/xenserverfolder on the TFTP server - Copy the following files from the XCP-ng ISO:
grubx64.efi,install.img(from the root directory),vmlinuz, andxen.gz(from the /boot directory) to the newEFI/xcp-ngdirectory on the TFTP server.
What the TFTP folder looks like when configured
# tree -L 1 /srv/tftp/
srv/tftp
└── EFI
  ├── xcp-ng
  │   ├── grubx64.efi
  │   ├── install.img
  │   ├── vmlinuz
  │   └── xen.gz
  └── xenserver
      └── grub.cfg
On the FTP, NFS or HTTP server, get all the installation media content in there.
For a layout example check the official repository.
When you do copy the installation files, DO NOT FORGET the .treeinfo file. Double check your webserver isn't blocking it (like Microsoft IIS does).
On the host
- Start your host
- Enter the boot menu (usually F12)
- Select boot from the Ethernet card
- You should see the PXE menu you created before!
iPXE over HTTP install
This guide is for UEFI boot, using iPXE over an HTTP server to serve files needed for installation.
Requirements
To get XCP-ng installed from iPXE over HTTP, you need:
- An HTTP server to host the XCP-ng installation files
- An iPXE-compatible network card and firmware on your host
- In your HTTP root directory copy the contents of the net install ISO.
The top-level should look like this:
# tree -L 1 /path/to/http-directory/
.
├── EFI
├── EULA
├── LICENSES
├── RPM-GPG-KEY-CH-8
├── RPM-GPG-KEY-CH-8-LCM
├── RPM-GPG-KEY-Platform-V1
├── boot
└── install.img
- Boot the target machine.
- Press Ctrl-B to catch the iPXE menu. Use the chainload command to load grub.
chain http://SERVER_IP/EFI/xenserver/grubx64.efi
Sometimes grub takes a very long time to load after displaying "Welcome to Grub". This can be fixed by compiling a new version of Grub with grub-mkstandalone.
- Once the grub prompt loads, set the root to http and load the config file.
# Replace with your server's IP
set root=(http,SERVER_IP)
configfile /EFI/xenserver/grub.cfg
- Select the "Install" menu entry.
- Wait for grub to load the necessary binaries. This may take a minute. If you look at your http server log you should see something like:
# (from python3 -m http.server path-to-directory 80)

192.168.0.10 - - [11/Mar/2021 03:25:58] "GET /boot/xen.gz HTTP/1.1" 200 -
192.168.0.10 - - [11/Mar/2021 03:25:58] "GET /boot/vmlinuz HTTP/1.1" 200 -
192.168.0.10 - - [11/Mar/2021 03:26:03] "GET /install.img HTTP/1.1" 200 -
- Continue with installation as normal.
Automated install
XCP-ng's installation can be automated by using network boot (PXE) or a custom installation image.
Answerfile
Unattended installation requires what is called an answer file, often spelled answerfile.
It is an XML file that contains the answers to questions the installer would ask during a manual installation.
Here is an example:
<?xml version="1.0"?>
    <installation srtype="ext">
        <primary-disk>sda</primary-disk>
        <guest-disk>sdb</guest-disk>
        <guest-disk>sdc</guest-disk>
        <keymap>us</keymap>
        <root-password>mypassword</root-password>
        <source type="url">http://pxehost.example.com/xcp-ng/</source>
        <post-install-script type="url">
            http://pxehost.example.com/myscripts/post-install-script
        </post-install-script>
        <admin-interface name="eth0" proto="dhcp" />
        <timezone>Europe/Paris</timezone>
    </installation>
Via PXE
Follow the previous section on Network boot (PXE) and add options that will fetch and use an answer file.
PXE unattended install - BIOS boot
Add answerfile=http://your_server/path/to/answerfile.xml install to the parameters passed to vmlinuz (the linux kernel of the installer).
Example:
default xcp-ng-auto
label xcp-ng-auto
    kernel mboot.c32
    append xcp-ng/xen.gz dom0_max_vcpus=2 dom0_mem=2048M,max:2048M com1=115200,8n1 console=com1,vga --- xcp-ng/vmlinuz xencons=hvc console=hvc0 console=tty0 answerfile=http://your_server/path/to/answerfile.xml install --- xcp-ng/install.img
Any SYSLINUX configuration style file will be valid. Find more on the syslinux website.
PXE unattended install - UEFI boot
Add answerfile=http://your_server/path/to/answerfile.xml install to the parameters passed to vmlinuz (the Linux kernel of the installer).
Example:
menuentry "XCP-ng Install (serial)" {
    multiboot2 /EFI/xcp-ng/xen.gz dom0_mem=2048M,max:2048M watchdog dom0_max_vcpus=4 com1=115200,8n1 console=com1,vga
    module2 /EFI/xcp-ng/vmlinuz console=hvc0 console=tty0 answerfile_device=eth0 answerfile=http://your_server/path/to/answerfile.xml install
    module2 /EFI/xcp-ng/install.img
}
Unattended installation with a custom ISO image
You may build a custom installation image that will automatically install XCP-ng. The answerfile can either be downloaded by the installer or embedded in the image itself.
Unattended installation ISO with remote config
If you can't or don't want to setup PXE but can still serve a file (the answerfile) from a server that will be available to the hosts during installation, you can create an automated installation image that will fetch its configuration from the network.
- Prepare an answerfile and make it available from a local HTTP server
- Extract the XCP-ng ISO file
- Modify the boot configuration to use the remote answerfile
- For BIOS boot, edit
/boot/isolinux/isolinux.cfg.- Locate the
installboot entry, which should look like this:
LABEL installKERNEL mboot.c32APPEND /boot/xen.gz dom0_max_vcpus=1-16 dom0_mem=max:8192M com1=115200,8n1 console=com1,vga --- /boot/vmlinuz console=hvc0 console=tty0 --- /install.img- Append
answerfile=http://your_server/path/to/answerfile.xml installto the parameters passed to vmlinuz, before the last---:
LABEL installKERNEL mboot.c32APPEND /boot/xen.gz dom0_max_vcpus=1-16 dom0_mem=max:8192M com1=115200,8n1 console=com1,vga --- /boot/vmlinuz console=hvc0 console=tty0 answerfile=http://your_server/path/to/answerfile.xml install --- /install.img - Locate the
- For UEFI boot edit
/EFI/xenserver/grub.cfg(and/EFI/xenserver/grub-usb.cfgfor USB installation).- Locate the
installmenuentry, which should look like this:
menuentry "install" {multiboot2 /boot/xen.gz dom0_max_vcpus=1-16 dom0_mem=max:8192M com1=115200,8n1 console=com1,vgamodule2 /boot/vmlinuz console=hvc0 console=tty0module2 /install.img}- Append
answerfile=http://your_server/path/to/answerfile.xml installto the parameters passed to vmlinuz, in the line that starts withmodule2 /boot/vmlinuz:
menuentry "install" {multiboot2 /boot/xen.gz dom0_max_vcpus=1-16 dom0_mem=max:8192M com1=115200,8n1 console=com1,vgamodule2 /boot/vmlinuz console=hvc0 console=tty0 answerfile=http://your_server/path/to/answerfile.xml installmodule2 /install.img} - Locate the
Your ISO is ready for installation.
Unattended installation ISO with embedded config
If you can neither setup PXE nor serve the answerfile from a server that will be available to the hosts during installation, you can create an automated installation image that will embed its own configuration. It's a bit more work and will need to be done again every time you want to modify the answerfile.
- Prepare an answerfile
- Extract the XCP-ng ISO file
- Modify the boot configuration to use a local (= embedded in the ISO) answerfile
- For BIOS boot, edit
/boot/isolinux/isolinux.cfg.- Locate the
installboot entry, which should look like this:
LABEL installKERNEL mboot.c32APPEND /boot/xen.gz dom0_max_vcpus=1-16 dom0_mem=max:8192M com1=115200,8n1 console=com1,vga --- /boot/vmlinuz console=hvc0 console=tty0 --- /install.img- Append
answerfile=file:///answerfile.xml installto the parameters passed to vmlinuz, before the last---:
LABEL installKERNEL mboot.c32APPEND /boot/xen.gz dom0_max_vcpus=1-16 dom0_mem=max:8192M com1=115200,8n1 console=com1,vga --- /boot/vmlinuz console=hvc0 console=tty0 answerfile=file:///answerfile.xml install --- /install.img - Locate the
- For UEFI boot edit
/EFI/xenserver/grub.cfg(and/EFI/xenserver/grub-usb.cfgfor USB installation).- Locate the
installmenuentry, which should look like this:
menuentry "install" {multiboot2 /boot/xen.gz dom0_max_vcpus=1-16 dom0_mem=max:8192M com1=115200,8n1 console=com1,vgamodule2 /boot/vmlinuz console=hvc0 console=tty0module2 /install.img}- Append
answerfile=file:///answerfile.xml installto the parameters passed to vmlinuz, in the line that starts withmodule2 /boot/vmlinuz:
menuentry "install" {multiboot2 /boot/xen.gz dom0_max_vcpus=1-16 dom0_mem=max:8192M com1=115200,8n1 console=com1,vgamodule2 /boot/vmlinuz console=hvc0 console=tty0 answerfile=file:///answerfile.xml installmodule2 /install.img} - Locate the
-
Add your answerfile
cp answerfile.xml "$WORK_DIR/install/answerfile.xml"
Your ISO is ready for installation.
Software RAID in answerfile
For an automated install using an answer file, software raid can be enabled as follows:
<?xml version="1.0"?>
<installation mode="fresh" srtype="lvm">
    <raid device="md127">
        <disk>sda</disk>
        <disk>sdb</disk>
    </raid>
    <primary-disk>md127</primary-disk>
    <keymap>us</keymap>
    <source type="url">https://xcp-ng.org/install/</source>
    <admin-interface name="eth0" proto="dhcp" />
    <timezone>Europe/London</timezone>
    <root-password>secret</root-password>
</installation>
As an improvement and to delay the md resync (increasing install speed by about 500% on certain drives), we can use the following in the answer file:
<script stage="installation-start" type="url">http://your-server/noresync.sh</script>
The noresync.sh script would do something like this:
#!/bin/sh
# echo 0 > /proc/sys/dev/raid/speed_limit_max
# echo 0 > /proc/sys/dev/raid/speed_limit_min
Upon server reboot, normal md resync will take place.
Boot from SAN
Instead of local disks, a host can be installed on (and boot from) a SAN LUN. Facts verified against the XCP-ng installer:
- Hardware HBA (Fibre Channel, FCoE HBA, SAS, hardware iSCSI): the HBA presents the LUN like a local disk, so the installer simply shows it in the disk selection step. Configure the HBA's boot BIOS so the server firmware boots from it.
- Software iSCSI boot (iBFT): on NICs whose firmware supports iSCSI boot (iBFT), boot the installer with the
use_ibftparameter: it reads the iSCSI target configuration from the firmware, connects to the LUN and offers it as an installation target. The NIC used for iSCSI is then reserved for storage traffic. - Multipath: if the LUN is reachable over several paths, also boot the installer with
device_mapper_multipath=enabledso the installation lands on the multipath device and the host boots with multipathing active from the start. Without it, installing on one bare path makes the "redundant" boot disk a single point of failure.
To pass these parameters, edit the boot entry at the installer's boot menu (or add them to your PXE configuration, next to the other installer parameters), for example:
device_mapper_multipath=enabled use_ibft
The same applies to automated installs: these are installer boot parameters, they go on the kernel command line, not in the answer file.
Advanced installation options (installer command-line parameters)
The XCP-ng installer can be further parameterized to support advanced installation environments. The command line options are passed as parameters to the vmlinuz kernel of the installer.
Definitions
"scriptlocation"
A URL pointing at a script. All URLs except for file:// trigger initialization of networking during the installer execution.
- file:/// - file inside the filesystem of the installer environment (i.e.
install.img) - ftp:// - file on an FTP server, fetched with urllib2
- http:// - file on an HTTP server, fetched with urllib2
- https:// - file on an HTTPS server, fetched with urllib2
- nfs:// - file on an NFS server, the directory is mounted and the file accessed
A script is either XML (for answerfile= or rt_answerfile=) or an executable script expected to begin with a shebang. The following interpreters are recognized.
- /bin/sh
- /bin/bash
- /usr/bin/python
- /usr/bin/env python
Environment
sshpassword="password"
Start an ssh server during installation allowing root to log-on interactively with the given password.
Behaviour
device_mapper_multipath=disabled|enabled
Run the installation on top of multipath devices, for boot from SAN setups. Default: disabled.
use_ibft
Read the NIC firmware's iBFT to determine the iSCSI boot configuration, for software boot from SAN.
atexit=reboot|poweroff|shell
Action to perform when the installer is finished.
- poweroff - power off the system
- reboot (default) - reboot the system
- shell - drop to shell after running the installer. NB: The installation target is already unmounted.
bash-shell
See shell.
console="devicename"
Use the named console device for the installer. Can be given multiple times.
E.g. console=hvc0 console=tty0
reboot
See atexit=reboot.
shell
Start a shell before running the installer.
Networking
If networking is required (e.g. to fetch an answerfile or access a repository) the installer will configure the detected network cards.
network_config=dhcp[:vlan="id"]
configure interface using DHCP optionally using a VLAN.
- vlan="id" - create a virtual interface tagging with vlan id backed by the underlying interface.
network_config=static:"network configuration"
configure interface with provided static information. The configuration is a ; separated list of stanzas.
- ip (mandatory)="IP address"
- netmask (mandatory)="netmask"
- vlan="id" - create a virtual interface tagging with vlan id backed by the underlying interface.
- gateway="gateway address" - use specified address as default route
- dns="DNS resolver address"[,"additional DNS resolver address"] -- use specified address(es) as resolvers
- domain="domain name" - use specified domain name as search domain
network_device="eth"|"mac"|all
Bring up networking on the given interface(s) to allow installer to fetch network resources.
- "eth" - the name of a network interface
- "mac"- the MAC address of a network interface
- all (default) - all network interfaces available to the installer's kernel environment
Automation
answerfile="scriptlocation"
Read the scriptlocation and perform non-interactive installation reporting status using screens interface. Cannot be used together with answerfile_generator=.
rt_answerfile="scriptlocation"
Read the scriptlocation and perform non-interactive installation reporting status using simple text to the console. Cannot be used together with answerfile_generator=.
answerfile_generator="scriptlocation"
Read the scriptlocation execute it and use its standard output as an answerfile to perform non-interactive installation. Cannot be used together with answerfile= or rt_answerfile=.
answerfile_device=
See network_device=.
Troubleshooting
Misc
Installation on USB drives
We strongly discourage the installation of XCP-ng on USB drives. The frequent writing actions required by XCP-ng can rapidly degrade a USB drive due to:
- XAPI: This is the XAPI database, which undergoes constant changes. This results in significant write operations, which are detrimental to the longevity of USB drives. Note: The XAPI database maintains the state of all XCP-ng operations and is replicated from the pool coordinator to all hosts.
- Logs: XCP-ng generates a substantial amount of debug logs. A possible solution is to use a remote syslog.
Installation on SD cards
For similar reasons as USB drives, we highly recommend against installing XCP-ng on SD cards. Opting for even a basic SSD would be vastly more effective in managing the XCP-ng system.