Guest UEFI Secure Boot
How to configure UEFI Secure boot?
Enabling UEFI Secure Boot for guests ensures that XCP-ng VMs will only execute trusted binaries at boot. In practice, these are the binaries released by the operating system (OS) vendor for the OS running in the VM (Microsoft Windows, Debian, RHEL, Alpine, etc.).
Recent changes in guest Secure Boot configuration
The default guest Secure Boot keys in XCP-ng are changing.
Previously, XCP-ng only shipped with the PK included by default; Secure Boot variables had to be installed using secureboot-certs.
New versions of XCP-ng's varstored (from version 1.2.0-3.4 and newer) now come with a complete set of Secure Boot variables (PK/KEK/db/dbx) by default, meaning that guest Secure Boot will now work for new VMs without needing further pool configuration.
The previous Secure Boot settings only included the 2011 Microsoft KEK and db certificates. Our defaults now include the 2023 Microsoft certificates, ensuring Secure Boot updates beyond 2026 (which is when the previous 2011 certificates expire), while ensuring compatibility with VMs migrated from VMware using XO V2V. These defaults will be automatically kept up-to-date as XCP-ng is updated.
Existing Secure Boot installations will not be automatically updated.
Recommended actions
1. On your XCP-ng pool
Our defaults will not be applied automatically on existing systems that have been set up for guest Secure Boot.
If you have installed your pool Secure Boot variables using secureboot-certs install, use secureboot-certs clear to reset them to the XCP-ng-managed defaults.
- If you haven't run
secureboot-certs installbefore, no action is required; your pool now supports guest Secure Boot by default. - Existing VMs will not be affected by this step.
- You can run
secureboot-certs clearagain if unsure. - This step is only needed once per pool.
2. On newly V2V-migrated VMs and new VMs created from default templates
No action is required once the pool is reconfigured with the new defaults.
3. On existing VMs and new VMs cloned from custom templates
These VMs will not be automatically updated.
The updated Secure Boot certificates are required on VMs with Secure Boot enabled (Windows and Linux) for future guest-initiated updates to the db and dbx Secure Boot variables to succeed. After configuring the pool, install the new certificates using the Propagate certificates procedure. This step is also required for Secure Boot support on previously V2V-migrated VMs.
Risk of data loss: Propagating certificates to an existing VM will change its Secure Boot vTPM measurements. If you depend on these measurements (e.g. BitLocker with TPM protector), you must carefully read the Preparing for Secure Boot Variable Changes procedure.
Requirements
- XCP-ng >= 8.2.1.
- UEFI Secure Boot Certificates installed on the pool (this is detailed below).
- A UEFI guest VM.
Note: it's not necessary that the XCP-ng host boots in UEFI mode for Secure Boot to be enabled on VMs.
8.3 with varstored >= 1.2.0-3.4
Secure Boot is ready to use on new VMs without extra configuration. Simply activate Secure Boot on your VMs, and they will be provided with an appropriate set of default Secure Boot variables.
We will keep updating the default Secure Boot variables with future updates from Microsoft. If you don't want this behavior, you can lock in these variables by using the Manually Install the Default UEFI Certificates procedure.
8.2.1 and 8.3 with varstored < 1.2.0-3.4
These versions of XCP-ng require manual configuration to enable Secure Boot.
We believe that reading this guide will provide you with useful knowledge about the way Guest Secure Boot is handled in XCP-ng, and let you avoid mistakes.
However, for those who would like to take a shortcut, here's how to set it up on a new pool.
- Run
secureboot-certs installto install the default UEFI certificates to your pool. - From now on, any new UEFI VM will be initialized with these certificates, the first time it boots.
- For any VM which was already initialized before the operation (booted at least once before):
- If it was started before UEFI certificates were installed on the pool, manually trigger the certificate propagation.
- If it comes from another pool (via migration, export/import, or a backup restore handled by Xen Orchestra) and had already been setup for UEFI there, no need to do it again. Else, treat it like a VM lacking certificates and also propagate the pool certificates to it.
- Enable Secure Boot on the VMs, using Xen Orchestra, or via command line with
xe vm-param-set uuid=<vm-uuid> platform:secureboot=true - Start them and check the Secure Boot status.
- Run
secureboot-certs installagain from time to time to refresh the certificate Revocation List of the pool.
Enabling the "Secure Boot" option for a VM does not guarantee that Secure Boot is actually enforced. The reason for this is that the UEFI specification defines a state called Setup Mode, where a VM initialized without any Secure Boot certificates will silently ignore any instruction to enforce Secure Boot.
So, to avoid any false sense of security, check the Secure Boot status for your VMs after you first enabled Secure Boot for them.
Starting with XCP-ng 8.3, Xen Orchestra was made to help you in the setup of Secure Boot:
- A warning is displayed if you attempt to enable Secure Boot on a pool or VM which are not ready for it due to missing certificates.
- In the VM's advanced view, a button lets you propagate the pool UEFI certificates to a VM which needs them.
- The detected Secure Boot status of the VM is displayed. More about this in Troubleshoot Guest Secure Boot Issues
How XCP-ng Manages the Certificates
Let's embark on our journey towards understanding how all this works.
To understand UEFI Secure Boot variables (PK, KEK, db and dbx), please read James Bottomley's article The Meaning of all the UEFI Keys.
In a few words:
PK: a single X509 key, the Platform Key.KEK: one or more X509 or RSA2048 keys, the Key Exchange Key.db: the Signature Database, a list of keys, signatures or hashes. They are used to validate signed EFI binaries and loadable roms.dbx: the Forbidden Signatures Database or Revocation List, a list of keys, signatures or hashes. They are used to reject binaries or loadable roms even if they were validated using the Signature Database (db).
In this guide, we often refer to those 4 UEFI variables as the Secure Boot certificates, or simply the certificates.
The certificates are stored at several levels:
- bundled in the varstored package and managed by XCP-ng updates,
- pool level (in the XAPI database),
- host disk (it basically mirrors the certificates in the XAPI database),
- VM level (in the VM's UEFI variable store).
To install or modify the certificates on the pool, use the secureboot-certs command line utility. See Configure the Pool. Once secureboot-certs is called, the XAPI DB entry for the pool is populated with a base64-encoded tarball of the UEFI certificates. Note: on XCP-ng 8.2.x, at this stage, the certificates are still not installed on disk: they only exist in the XAPI DB*. See "Host disk certificates synchronisation" below.
Host disk certificate synchronization:
- On XCP-ng 8.2.x, the certificates are updated on the host's disk (in
/var/lib/uefistored/) each time a UEFI VM starts on the host, if needed. - On any more recent release (8.3 or above), the disk certificates (now in
/var/lib/varstored/) are updated directly whensecureboot-certs installis run, and again at every XAPI startup afterwards if needed. New hosts joining a pool also directly get a copy of the pool's UEFI certificates, without user intervention.
Pool-level and host-level certificates are here to serve only one purpose: be available for initializing a UEFI VM's EFI variable store with these certificates, so that Secure Boot can be enabled on this VM at the user's convenience. Once the VM is initialized, changes made to the pool's UEFI certificates will not be automatically propagated to VMs.
At the VM level:
- Each VM stores a copy of the certificates in its own EFI variable store, initialized the first time it boots.
- These certificates are necessary to enforce Secure Boot: they allow to validate or reject the binaries that boot the Operating System.
- The VM's Operating System may update some of the VM's certificates by itself (Windows updates the revocation list,
dbx, when needed). - We provide administrators with tools to manage a VM's UEFI certificates if needed.
Configure the Pool
For pools with varstored version >= 1.2.0-3.4, no action is required.
For pools with varstored < 1.2.0-3.4, before enabling UEFI Secure Boot for guest VMs, you need to install a set of certificates to the pool using the secureboot-certs script on the pool master. This tool downloads, formats, and installs UEFI certificates for the PK, KEK, db, and dbx certificates in the XCP-ng pool.
To download and install XCP-ng's default certificates (what almost all users will want), see Manually Install the Default UEFI Certificates.
For custom certificates (advanced use), see Install Custom UEFI Certificates
Manually Install the Default UEFI Certificates
This procedure is not necessary if you're using varstored 1.2.0-3.4 and newer. However, you can use the procedure anyway to lock in the default variables per pool and avoid further default changes.
secureboot-certs supports installing a default set of certificates across the pool.
Except the PK key which is already provided by XCP-ng, all certificates are downloaded from official sources (microsoft.com and uefi.org).
The default certificates are sourced as follows:
With varstored < 1.2.0-3.4:
| Certificate | Source | CLI Arg |
|---|---|---|
| PK | Provided by XCP-ng, already present on disk. | default |
| KEK | Microsoft Corporation KEK CA 2011 | default |
| db | Microsoft Corporation UEFI CA 2011 and Microsoft Windows Production PCA 2011 | default |
| dbx | UEFI Revocation List | latest |
With varstored >= 1.2.0-3.4:
All keys are built into varstored-tools and present on disk. There's no need to configure them except for custom Secure Boot scenarios.
Certificate and revocation lists provided by microsoft/secureboot_objects.
| Certificate | Source | CLI Arg |
|---|---|---|
| PK | Provided by XCP-ng. | default |
| KEK | Microsoft Corporation KEK CA 2011 and Microsoft Corporation KEK 2K CA 2023 | default |
| db | Microsoft Windows Production PCA 2011, Windows UEFI CA 2023, Microsoft Corporation UEFI CA 2011, Microsoft UEFI CA 2023 and Microsoft Option ROM UEFI CA 2023 | default |
| dbx | Image hashes provided by microsoft/secureboot_objects (can specify latest to download latest dbx instead) | default |
To install these variables from the command line interface:
# Download and install PK/KEK/db/dbx certificates (varstored < 1.2.0-3.4)
secureboot-certs install default default default latest
# or simply: secureboot-certs install

# Reinstall and lock built-in PK/KEK/db/dbx variables (varstored >= 1.2.0-3.4)
secureboot-certs install

# Go back to XCP-ng-managed defaults (varstored >= 1.2.0-3.4)
secureboot-certs clear
If secureboot-certs fails to download the certificates from Microsoft due to microsoft.com deciding to forbid downloads from the user agent declared by the script, you may try to download with a different user agent (for example your current browser's user agent):
secureboot-certs install --user-agent="Mozilla/5.0 My custom user agent"
If this still fails, check the next section which explains how to install them manually.
Install the Default UEFI Certificates Manually (varstored < 1.2.0-3.4)
- Using your web browser, download the certificates listed in the table above (
KEK, CA and PCA which will allow us to builddb, anddbx). - Transfer the files to your master host.
scp Mic*.crt dbxupdate_x64.bin root@ip_of_server:
- Build
db.auth:- SSH to the server as root
- convert the files from DER format to PEM:
openssl x509 -in MicCorUEFCA2011_2011-06-27.crt -inform DER -outform PEM -out ms_ca.crtopenssl x509 -in MicWinProPCA2011_2011-10-19.crt -inform DER -outform PEM -out ms_pca.crt
- bundle these files into
db.auth:/opt/xensource/libexec/create-auth db db.auth ms_ca.crt ms_pca.crt
- Install the certificates:
secureboot-certs install default MicCorKEKCA2011_2011-06-24.crt db.auth dbxupdate_x64.bin
Install Custom UEFI Certificates
Advanced use, not needed by most users.
secureboot-certs also supports installing your own custom certificates. The certs may be in the following formats:
- DER-encoded certificate
- PEM-encoded certificate
- An auth file (can be created with
/opt/xensource/libexec/create-auth).
For example, to install a custom PK you may do the following:
# Enroll a custom PK along with the default KEK/db/dbx
secureboot-certs install PK.cer
The same procedure may be used to install custom KEK, db, or dbx variables.
To use multiple certificates in one variable (that is, have multiple certificates stored as a single KEK, db, or dbx), the certs must be packaged together into a .auth file, see Use two or more certificates for a Secure Boot variable. Note that multiple certificates in the PK is not supported. If an auth file with multiple certs is loaded as the PK, only the first one found will be used.
Note that the virtual firmware, as is allowed by the specification, does not mandate that these default certificates be signed by their parent (i.e., the KEK doesn't need to be signed by PK) if they're installed via secureboot-certs. This verification does occur, however, when trying to enroll new certificates from inside the guest after boot. This is designed to give the host administrator full control over the certificates from the control domain.
You can also omit the dbx variable entirely. This is the most compatible option for old installation media that may not include the newest Secure Boot fixes. Once installed, the guest can still update the dbx variable on its own to revoke vulnerable bootloaders as long as the default KEK is included. Omitting the dbx variable can be done using the following command:
# Install default PK/KEK/db variables, omit the dbx
secureboot-certs install default default default none
For help with the tool's install functionality, call secureboot-certs install -h.
Resetting Pool UEFI Certificates (varstored >= 1.2.0-3.4)
If you want to revert to the XCP-ng pool Secure Boot defaults, simply issue the following command:
secureboot-certs clear
Existing VMs will not be affected.
Enable Secure Boot for a Guest VM
Enable Secure Boot at VM creation
First, ensure your pool was setup for UEFI SecureBoot.
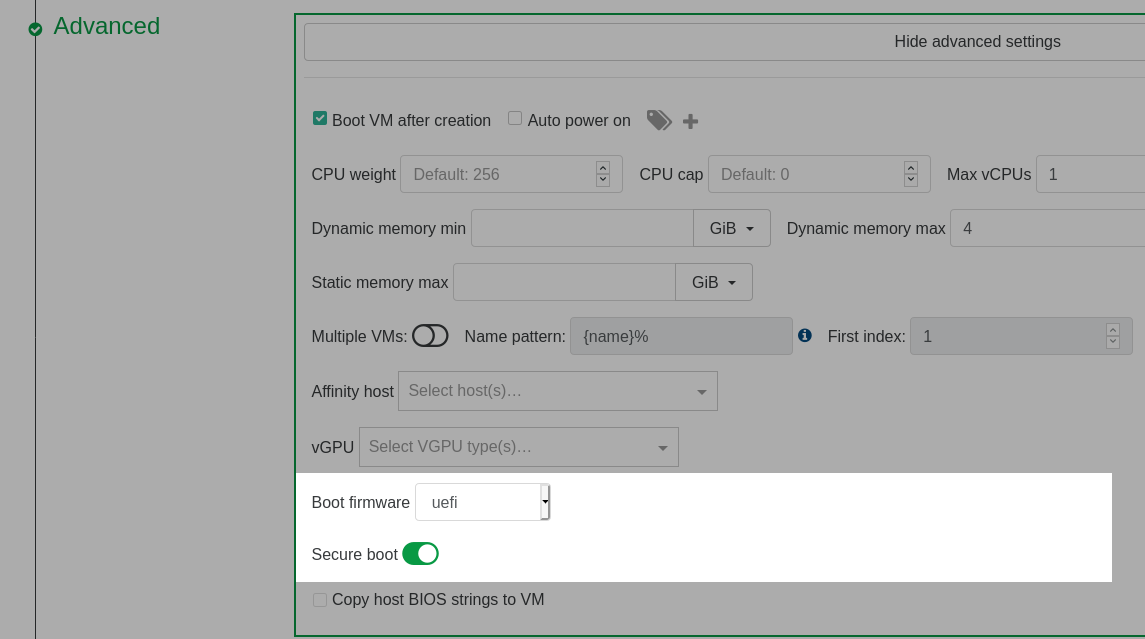
During VM creation in Xen Orchestra, go to the Advanced section and select uefi as the Boot firmware. This will display a Secure boot toggle that can be clicked to enable Secure Boot.
Enable Secure Boot for an Existing UEFI VM
Prerequisite: make sure the VM is booting in UEFI mode
Warning: it is not recommended changing an existing VM's firmware type from BIOS to UEFI.
Enable Secure Boot for an Existing UEFI VM in Xen Orchestra
-
Shutdown the VM if it is not already shut down.
-
Go to the Advanced tab of the VM and click the Secure boot toggle to enable Secure Boot.

Enable Secure Boot for an Existing UEFI VM using xe
-
Shutdown the VM using the shutdown command if it is not already shut down.
-
In the XCP-ng CLI, set the platform Secure Boot mode to
true:
# Enable Secure Boot for the VM
xe vm-param-set uuid=<vm-uuid> platform:secureboot=true
Check Secure Boot Is Actually Enforced
Boot the VM, and check Secure Boot is really enforced. There are cases where you may think it is enforced but it isn't. See also Troubleshoot Guest Secure Boot Issues.
Any issues? Check Troubleshoot Guest Secure Boot Issues.
Setup Secure Boot for Windows VMs
Windows VMs do not require extra installation packages because the Windows Loader and kernel are signed by the keys already installed by the secureboot-certs script. Enabling Secure Boot for the VM in XCP-ng enables Secure Boot in the VM UEFI firmware.
If your VMs have any unsigned drivers, they will fail to load after enabling Secure Boot. Be sure to use the latest XCP-ng or Citrix tools package.
Setup Secure Boot for Linux VMs
In theory (read why it's in theory in the Boothole and fallouts box below), the installers for mainstream Linux distributions (debian, RHEL, etc.) should install properly signed bootloaders and binaries, and should be installable in SB mode directly. Some other Linux distributions may require special packages for Secure Boot to function. Check that the distribution does support Secure Boot and follow the distribution's documentation to install any required Secure Boot software (e.g., shim) before enabling Secure Boot for the VM in XCP-ng.
If the VM has any unsigned kernel modules, they will fail to load after enabling Secure Boot. Furthermore, the distribution will likely restrict other kernel features that are seen as loop holes in Secure Boot (kexec, /dev/mem, etc…). Please read the Secure Boot documentation from the distribution.
2020 and 2021 have been complicated years for Secure Boot on Linux, due to major security flaws in grub ("Boothole" and its fallouts). Thus all certificates that allowed Linux distributions to boot in SB mode have been revoked, twice, and new ones have (or had) to be issued.
Consequences:
- Any installer that is not recent enough will fail to boot in Secure Boot mode if the most recent revocation list (
dbx) is used (which is highly recommended if security is your objective). - Distributions using the revoked certificates require updates before SB can be enabled (and possibly manual changes?).
Disable Secure Boot for a Guest VM
Disable Secure Boot for a Guest VM using XO
Navigate to the Advanced tab and use the Secure boot toggle to disable Secure Boot. Reboot the VM and Secure Boot will be disabled.
Disable Secure Boot for a Guest VM using xe
In the XCP-ng CLI:
# Disable Secure Boot for the VM
xe vm-param-set uuid=<vm-uuid> platform:secureboot=false
Reboot the VM and Secure Boot will be disabled.
Troubleshoot Guest Secure Boot Issues
You may encounter the following issues with your VMs when enabling Secure Boot:
- The VM won't boot.
- The VM does boot, but SecureBoot is actually disabled.
Starting with XCP-ng 8.3, you can get a "secureboot readiness" status of a VM: from command line using xe vm-get-secureboot-readiness uuid=<vm-uuid>, or directly in Xen Orchestra's VM detail views. This table may also be of use for users of XCP-ng 8.2.1, but they will have to identify which situation they are in manually.
| Code | Label | Meaning or Symptoms | Solution |
|---|---|---|---|
| disabled | SecureBoot not enforced | Secure Boot was not enabled by the user for this VM. | Enable it if you need to. |
| first_boot | SecureBoot enforced, pending first boot | Normal transient state. Secure Boot was enabled by the user but the VM hasn't booted yet so its certificates are still empty. | Boot the VM at least once so that the pool's UEFI certificates are propagated to it. |
| ready | SecureBoot enforced | From the hypervisor's point of view, all is ready for Secure Boot in the VM, and it's enforced. If the VM boots to a UEFI shell, this means that the boot binaries didn't pass the Secure Boot validation. | In case of boot failure, either the installed OS doesn't support Secure Boot, or its binaries were signed with a key which is not valid (anymore?) according to the UEFI certificates installed in the VM's UEFI variable store, or the installed certificates are wrong or inconsistent. |
| ready_no_dbx | SecureBoot enforced, but no dbx present | The minimum certificates necessary to enforce Secure Boot are present, but the revocation list is missing. This is not a good idea. See Secure Boot and revoked certificates. | We advise to install the dbx revocation list. |
| setup_mode | ⚠️ SecureBoot wanted, but disabled due to the VM being in UEFI setup mode | There is a mismatch between the user intent (enabling Secure Boot) and the state of the VM certificates (no PK, so the VM is in Setup Mode). The VM boots, but Secure Boot is actually disabled! | Check your pool was setup for Secure Boot, set it up if needed, then propagate the pool certificates to the VM. |
| certs_incomplete | ⚠️ SecureBoot wanted, but some EFI certificates are missing | Unbootable VM because Secure Boot can't be enforced, due to missing certificates. Only some certs are present. This will often mean that your VM was booted before your pool was setup for Secure Boot, so it only has the PK key, and is missing the rest of the necessary certificates. | Check your pool was setup for Secure Boot, set it up if needed, then propagate the pool certificates to the VM. |
Secure Boot and revoked certificates
Revocation database updates
When there are security concerns related to some of the certificates involved in binary signing, they are revoked. That is, they are added to the dbx certificate revocation database.
On actual hardware, this dbx update would be propagated to you through a firmware update, or be coming from your OS itself. For example, Microsoft updates the dbx database of the computer as part of some of its security updates.
We recommend that you use the default Secure Boot variables provided by XCP-ng.
- These variables are automatically updated by varstored updates.
- Any new VM will use the updated certificate databases the first time it starts.
- Existing VMs won't be affected (unless they've never been booted after the first time you installed certificates to the pool).
- For existing VMs, either let them update the variables on their own (Windows does that), or update manually.
VMs that won't boot due to a revoked certificate
Installed OSes and installation media that were previously perfectly bootable in Secure Boot mode may become unbootable after the certificate that signed their binaries is revoked.
This is what happened in 2021 to the certificates used by all Linux distributions that support Secure Boot, due to major security flaws in grub (this was fixed since).
You might encounter issues related to this in one of the following situations:
- You try to install a VM with an installation media whose binaries were signed by a key that has been revoked.
- You try to enable Secure Boot on an existing VM whose binaries were signed by a key that has been revoked.
- You manually updated the dbx on an existing (Linux) VM.
Despite this, we still recommend that you always install the latest revocation database (dbx) on your pools. Not doing so lowers the security of Secure Boot, as any malicious binary signed with a revoked certificate would pass Secure Boot checks.
If you can't boot an installation media:
- Check whether their exists an updated installer signed with a valid certificate. If yes, use it.
- Else go to "It still can't boot" below.
If you can't boot an existing VM:
- Disable Secure Boot, update the OS, follow any instructions from the OS provider related to the update of the signed binaries, power off, re-enable Secure Boot, try to boot.
- Else go to "It still can't boot" below.
It still can't boot:
- either disable Secure Boot for the VM, as its binaries are not secure anymore anyway. This can be temporary until an update brings properly signed binaries.
- or install an older
dbxto the VM, downloaded from the archive of prior versions ofdbxfiles. Let us stress again that this exposes the VM to risk, and therefore, we recommend that before choosing an archiveddbxusers evaluate the vulnerabilities that their guest system will be exposed to by omitting the most recent revocations. Above all, downgrading thedbxmust not give you a dangerous false sense of security.
Certificate Management
View Certificates Already Installed on the Pool
To view the default certificates that are available pool-wide:
secureboot-certs report
If it lists PK, KEK, db and dbx, then your pool was already setup for Secure Boot.
Change the Certificates Already Installed in a Pool
To change the certificates in a pool, simply call secureboot-certs install in the same ways as described in Configure the Pool.
The new certificates will be used for new VMs, but will not be automatically propagated to existing VMs. If you want an existing VM to use the new certificates, explicitly propagate them to it.
Remove Certificates from the Pool
To remove the installed certs in the pool:
secureboot-certs clear
Note that this does not remove the certs from the VMs. On XCP-ng 8.2.x it doesn't remove them from host disk either.
- On XCP-ng 8.2.x: to remove them from disk, remove the ".auth" files for the certs you'd like to remove, on every host (found in
/var/lib/uefistored/). - On XCP-ng 8.3 and later, host disk certificates will be removed by the clear command.
View Certificates Already Installed in a VM
List UEFI variables:
varstore-ls <vm-uuid>
And then to see the full cert:
varstore-get <vm-uuid> <guid> <name> | hexdump -Cv
The GUID and name for varstore-get are the values returned by varstore-ls.
Change the Certificates Already Installed on a VM
A VM will usually have its own copy of the UEFI certificates (unless it never booted on a host that has certificates installed). To verify this, execute:
varstore-ls <vm-uuid>
If the relevant certs are installed, their names will be in the output (i.e., PK, KEK, db, or dbx).
Preparing for Secure Boot Variable Changes
Changing existing Secure Boot certificates on a vTPM-enabled VM will invalidate its PCR7 measurements. Any encryption keys bound to the TPM (e.g. disk encryption keys) will become inaccessible. Make sure to take a backup of your disk encryption key (e.g. BitLocker recovery key) before making any changes to Secure Boot.
If you're using BitLocker with a TPM-based key protector, use the following command to query the TPM binding state of your VM:
manage-bde -protectors -get C:
The following output shows an example of a Secure Boot-bound TPM configuration:
Volume C: []
All Key Protectors

    [...]
      ID: {XXXXXXXX-XXXX-XXXX-XXXX-XXXXXXXXXXXX}
      PCR Validation Profile:
        7, 11
        (Uses Secure Boot for integrity validation)
Before changing Secure Boot keys, run this command to suspend BitLocker protection:
manage-bde -protectors -disable C: -rebootcount 1
BitLocker protection will continue immediately at reboot.
You will need to follow the sequence: suspend BitLocker - immediately shutdown - update Secure Boot certificates - restart.
Alternatively, you may increase the -rebootcount value, update Secure Boot variables, then subsequently resume protection with the following command:
manage-bde -protectors -enable C:
If using systemd-cryptenroll or clevis, follow your distribution's user manual.
Propagate Pool Certificates to a VM
You may need to trigger the propagation of the pool's default UEFI certificates to a VM.
Possible reasons:
- The VM is in one of the situations described in Troubleshoot Guest Secure Boot Issues.
- You want to update the VM certificates after you updated the pool certificates.
To trigger the propagation of the pool's default UEFI certificates to a VM:
- On XCP-ng 8.3 and above, Xen Orchestra offers a "Copy the pool's default UEFI certificates to the VM" button in the VM's Advanced view.
- Else, from the command line, you can run:
varstore-sb-state <vm-uuid> user.
Update VM Certificates Manually
Advanced use, not needed by most users.
To update an individual certificate in the VM's NVRAM store:
- Create or download an X509 certificate, or a
.authcertificate list file. - If you are starting with an X509 certificate, use
/opt/xensource/libexec/create-authto convert it into a.authfile. - Shutdown the VM
- Use varstore-set to load the .auth file into a VM. The attributes arg must be set to 0x27.
Where name is one ofvarstore-set <vm-uuid> <guid> <name> 0x27 path/to/file.auth
PK,KEK,dbanddbx. The GUIDs for each variable are:8be4df61-93ca-11d2-aa0d-00e098032b8c PK8be4df61-93ca-11d2-aa0d-00e098032b8c KEKd719b2cb-3d3a-4596-a3bc-dad00e67656f dbd719b2cb-3d3a-4596-a3bc-dad00e67656f dbx
Misc
Secure Boot and the UEFI Firmware Menu in the Guest
Disabling and enabling Secure Boot from the UEFI firmware menu inside the guest VM is explicitly disallowed on XCP-ng so as to ensure that guest users can not tamper with the Secure Boot policy set by the host administrator. This differs from enabling Secure Boot on physical hardware because that is typically done through the UEFI menu. On XCP-ng, instead, that privilege is given only to host administrators through the uefistored daemon and varstored-tools package.
Changes to the UEFI secure boot state in the UEFI menu will be ignored in favor of the host administrator's configuration. For example, deselecting Attempt Secure Boot will not disable Secure Boot on the next boot, although it would do so on a physical platform.
If disabling Secure Boot by removing keys via Custom Mode is attempted in the UEFI firmware menu, an error will display stating Only Physical Presence User could delete NAME_OF_KEY in custom mode! For example, if attempting to remove the PK:

Check whether a VM runs on UEFI firmware from command line
xe vm-param-get uuid=<vm-uuid> param-name=HVM-boot-params param-key=firmware
Check UEFI Secure Boot status from inside the VM
Enabling Secure Boot for a VM means that it will either boot an appropriately signed bootloader and OS kernel, or not boot at all if the Secure Boot checks didn't pass.
You may still want to verify, from inside a booted VM, whether Secure Boot was enforced or not.
On Linux VMs, you can either:
- run
dmesg -i secureboot, which works on many distributions (not all) and should give you a line that looks likesecureboot: Secure boot enabled - or, if
mokutilis installed, runmokutil --sb-state, which should outputSecureBoot enabled - or directly extract the information from the UEFI variables:
The result should be either# read the last byte of the SecureBoot variable and display it in hex formattail -c1 /sys/firmware/efi/efivars/SecureBoot-8be4df61-93ca-11d2-aa0d-00e098032b8c | xxd -p
01(enabled) or00(disabled)
On Windows VMs, you can either:
- run
msinfo32and check the value ofSystem Summary/Secure Boot State(expected:On) - or, from PowerShell as admin, run
Confirm-SecureBootUEFI(expected:True)
Use two or more certificates for a Secure Boot variable
Advanced use, not needed by most users.
To create a Secure Boot variable (PK, KEK, db, or dbx) with multiple certificates, it is required to use the create-auth tool to bundle the certificates into a single .auth file.
From command line, to create a KEK with certificates cert1.crt and cert2.crt:
/opt/xensource/libexec/create-auth KEK KEK.auth cert1.crt cert2.crt
To create the same auth as above, but also sign it with a custom key:
/opt/xensource/libexec/create-auth -c signer.crt -k signer.key KEK KEK.auth cert1.crt cert2.crt
After creating the auth file, use secureboot-certs to install it with the rest of your certs:
# Install custom KEK, download and install public PK/db/dbx certificates
secureboot-certs install default KEK.auth default latest
This may be done with any PK, KEK, db, or dbx.
Remove Certificates from a VM
Advanced use, not needed by most users.
PK, KEK, db and dbx can be removed one by one with: varstore-rm <vm-uuid> <guid> <name>.
For example, to remove the dbx from a VM.
varstore-rm <vm-uuid> d719b2cb-3d3a-4596-a3bc-dad00e67656f dbx
Note that the GUID may be found by using varstore-ls <vm-uuid>.
On XCP-ng 8.2.1, it's almost impossible to remove a VM's UEFI certificates, because any missing certificate will be automatically added back the next time the VM starts, if available among the pool certificates. On XCP-ng 8.3 and above, removed certificates remain removed.
UEFI Setup Mode
Advanced use, not needed by most users. Only works on XCP-ng 8.3 and above.
A VM without a PK is in UEFI Setup Mode. In this mode, defined in the UEFI specifications, Secure Boot can't be enforced.
We don't know why someone would want to use Setup Mode in their VMs, but if for any reason you need it, you can switch a VM to Setup Mode with:
varstore-sb-state